To begin we should setup an IP Pool for your NSX Controllers to automatically assign out. Login to the vCenter Web Client, select the "Networking & Security" option on the left hand side bar from the home screen. From here select the "NSX Managers" option.

From here select the IP of your NSX Manager and then select the Manage tab, and the Grouping Objects subsection, select the IP Pools grouping object, and click on the + icon to add a new IP Pool.

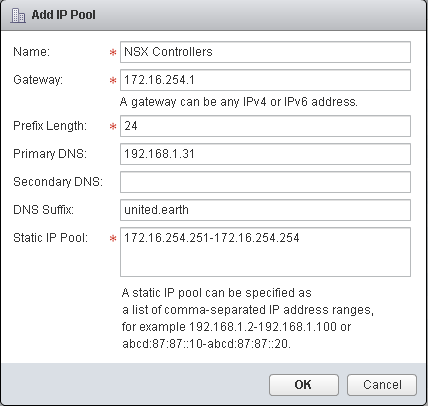
You should run the NSX controllers in sets of odd numbers starting from 3 and up. So allocate a pool with a minimum of three addresses. The Add Pool process can also be done from the directly from the next section of the NSX Controllers deployment by clicking on the "Add Pool" option within the Add Controller dialog.
With you're IP Pool configured we'll move onto defining and deploying the NSX Controllers.
You can either click on the Back button inside the vCenter WebClient or goto Home and back to "Networking & Security". Choose Installation from the left hand side menu now.


Once you're controllers are prepared, we'll be moving onto the next tab Host Preparation. This portion of the installation will push out the ESXi host side components for the Distributed Firewall, and VXLAN services.

Once you're cluster has completed setup of the NSX package and the Distributed Firewall package you will see our familiar green check mark under both Installation status, and Firewall. The installation field also keeps track of the version of the components installed.
The next step requires a dvSwitch, so we're going to configure one, add hosts to it, and then come back to the installation of the VXLAN service. Click on the Home icon in the vCenter Web Client and then select the Networking inventory section.
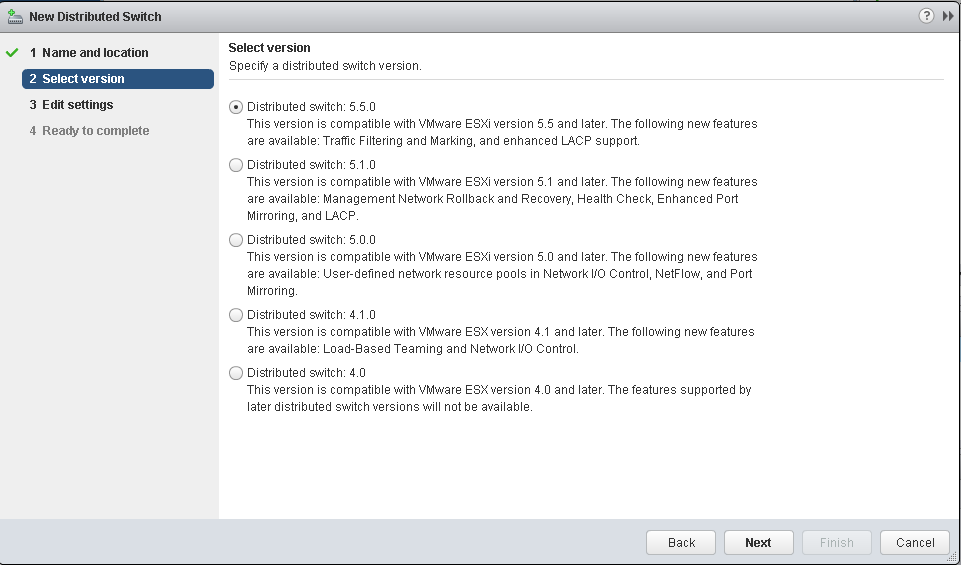
From the Networking screen right click on your Datacenter and select New distributed switch


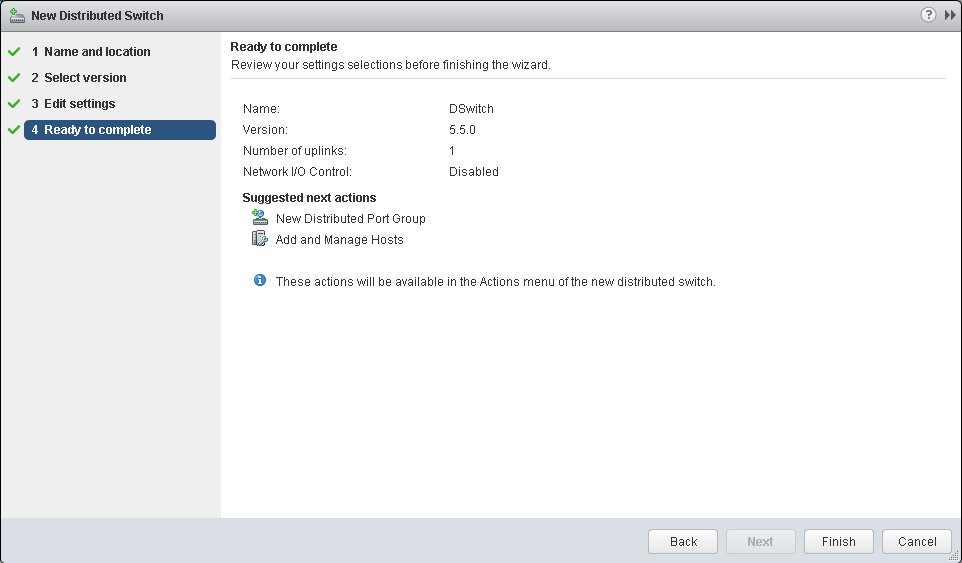
Right click on your new dvSwitch and select Add or Manage Hosts

Select Add for the operation type, and click on next.


If you are a lucky man, all your hosts are the exact same hardware with all their NIC connected the same way and you can use template mode to join the hosts.

Next select the host to use as a template.


Set the uplinks for your template host, and then hit the Apply to all

vCenter will now asses the impact! Since we are not moving VMKernel Adapters or VM, and as long as you're not stealing a physical NIC that is already backing another distributed or standard switch that holds a VMKernel Adapter your screen should be telling you No impact.


Back to the vCenter WebClient Home screen and back into Networking & Security and our Installation section, and click on the Configure option under the VXLAN column. I have already created another IP Pool through the same process we went through to create an NSX Controller IP Pool, once again the Add Pool option is also available in the IP Pool drop down. Be keen to match the VMKNic Teaming Policy with one that matches your uplinks. I have chosen explicit failover as my VXLAN will be going over a single link. Options are:
All Distributed Switch Versions:
Fail Over: which will give you an explicit fail over order and use a Active / Standby set up for all uplinks
Static Etherchannel: which will give you an Active/Active Route by IP Hash for uplinks
Load Balance - SRCID: utilizes the normal route based on originating virtual port id
Load Balance - SRCMAC: utilizes the alternate load balance algorithm based on source MAC address;
Distributed Switch 5.1:
LACP Active: which will give you route by IP Hash for uplinks
LACP Passive: which will give you route by IP Hash for uplinks; but the physical switch must be in Active state, or the Link will not be brought online.
Distributed Switch 5.5:
Enhanced LACP: Utilizes the Enhanced LACP configuration your vSphere 5.5 distributed Switch


If you set your Recent Task panel to show All Users' Tasks you should see the the an Add Virtual NIC Task for each host, along with an Add Distributed Port Group, and many Update opaque data tasks.

If you switch over to the Logical Network Preparation tab, and the VXLAN Transport section you should now see all hosts listing with a green check mark and the VMKnic IP's that have been set up as VTEP endpoints.

We're now done with the VXLAN set up. The final tab in the Installation section is Service Deployments this is used to push out VMware Endpoint, and VMware Data Security. Also as third party services are registered with NSX you will be able to deploy them from this tab. I will discuss these services in later posts.
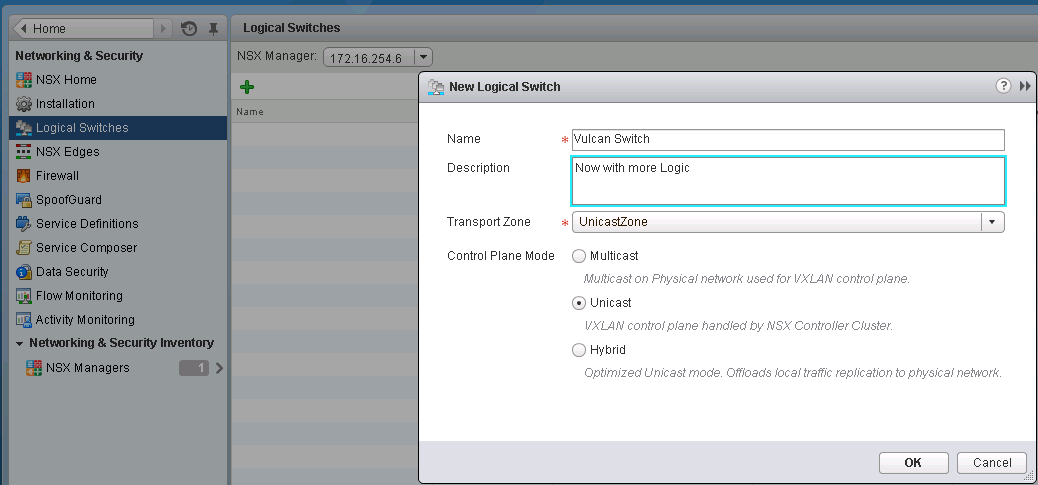
To being adding VXLAN Logical Switches, select the Logical Switches section, and click on the green +.
These break down to mean:
vxw is for VXLAN Wire
dvs-## is the dvs Managed object reference identifier
vlanid is the VLAN the VXLAN VTEPs are running in
UUID is a randomized unique identifier
vtepgroup is the VTEP group id the VXLAN is defined in
segmentid is the assigned segment id in use by this VXLAN wire
logical switch name is the name you assigned to the Logical switch

Next post I will cover setting up an NSX Edge as a routing point out of the VXLAN networks.
No comments:
Post a Comment